
AA: Scraping Data Off The Bot Store (Part-III)
Congratulations, you have made it to the last installation of our data scraping series!
In this installation, we will add in a couple of enhancements that will convert our data scraper into a user friendly automation.
Attended Automation is What It’s Called
Although most businesses prefer to have their automations unattended, there are times however, when attended automation enhances the user experience.
This is one of those instances.
First, let me guide you through the thought process involved.
Automation Anywhere Bot Store
The Bot Store is where users like you and I can download bots developed by other users, or upload our very own bots to.
Most bots are free, and while you have the option of adding your own bots to the store, you may also monetize some of that creativity and generate passive income.

The botstore is divided into various categories, and has also dedicated separate pages for each category.
Say you wish to scrape the details of bots that operate with MS Word, then we have to first navigate to the page consisting of MS Word Bots, before our bot can work its magic.
Also, maybe today you were tasked with extracting Bot Details from MS Word, and maybe tomorrow you will be tasked with extracting Bot Details for MS Excel.
This requires your intervention each time. The dependency hasn’t shifted away from you, and you will keep getting pulled back into this process.
To make the process dynamic, we have to first study the website, the URL, and the suffixes that appear once you navigate to a given category etc.
This is what the URL looks like on its homepage:
https://botstore.automationanywhere.com/And this is what the URL changes to once we navigate to MS Word.
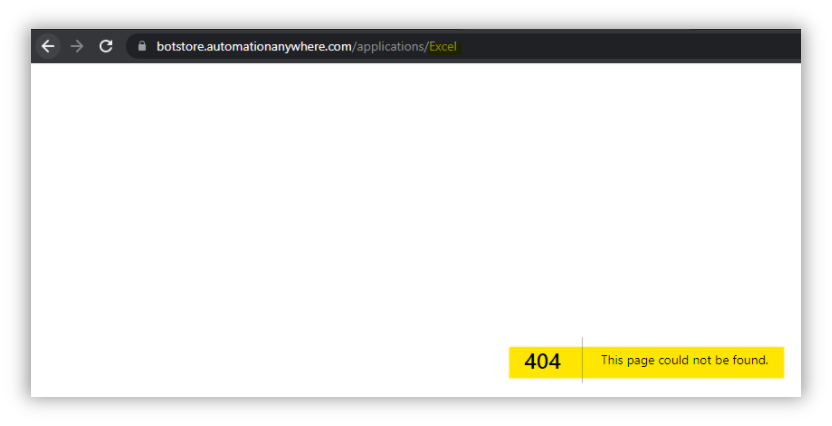
https://botstore.automationanywhere.com/applications/wordLets head over to another category, say Excel, and see what changes are imparted to our base URL.
https://botstore.automationanywhere.com/applications/excelFrom this we can conclude that everything stays fixed up until applications/, after which the item changes.
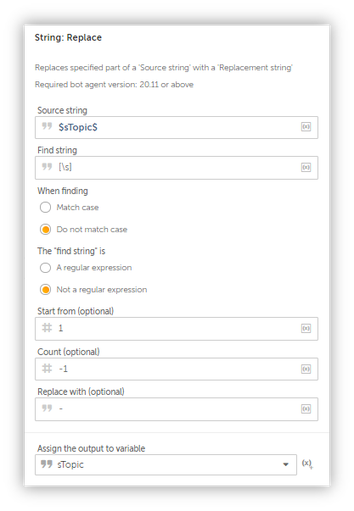
That item will be replaces with a variable as shown below:
https://botstore.automationanywhere.com/applications/$sTopic$Few items contain spaces, which are replaced with a “-”.
https://botstore.automationanywhere.com/applications/e-transThe String: Replace Action can help us with this.
There are many other factors to keep in mind.
You will run into an error if you tried to launch the website using the item in proper case.
Anyway…
Spend some time thinking about what the possible resolutions could be for this particular error.
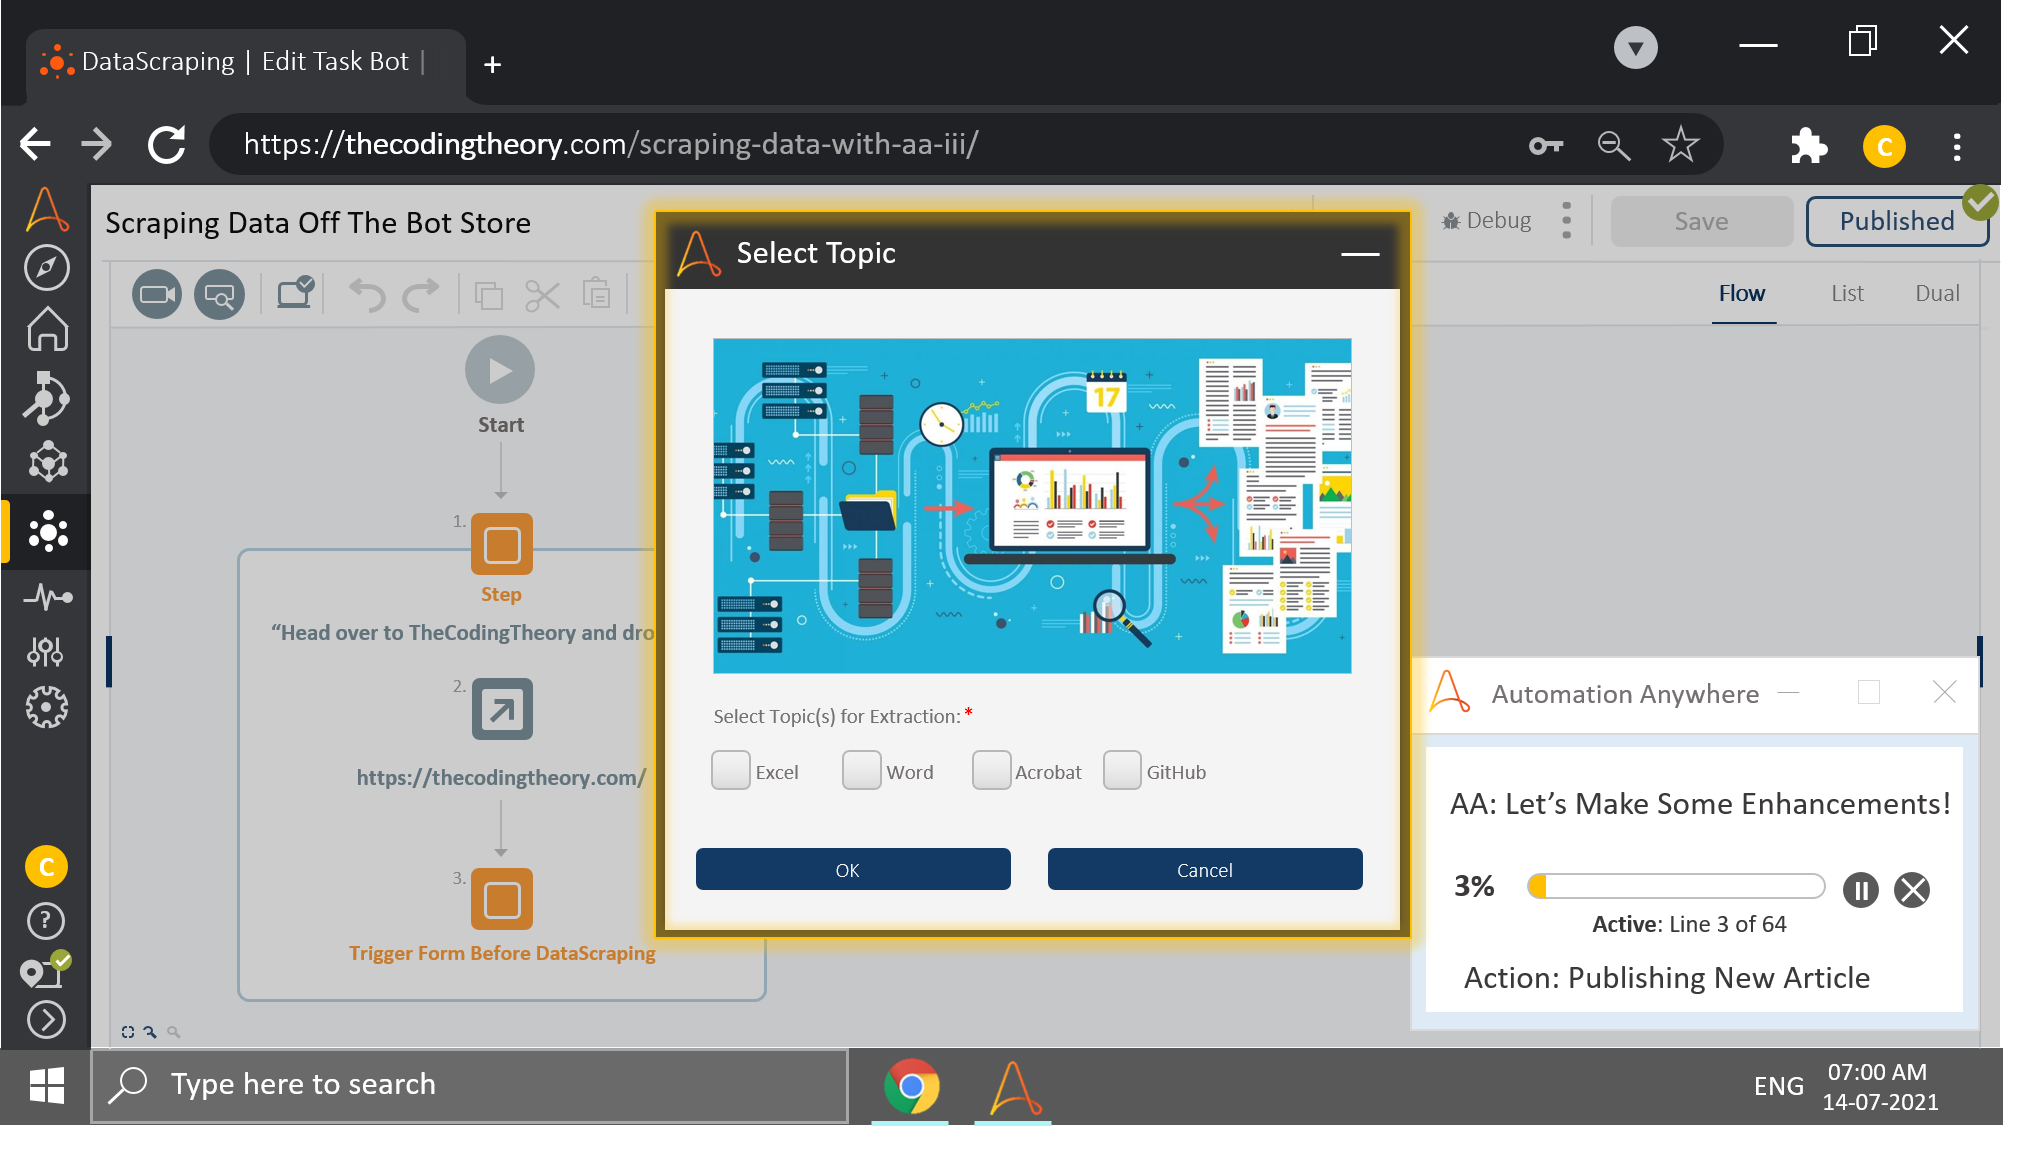
Presenting The User With Options To Select From
Now onto the juicy bits.
To achieve our attended automation, we will use a Form.
What, you thought Automation Anywhere was only capable of creating bots? It can create forms and processes as well.
More on that in a coming article.
For today, we will focus on forms and how we may leverage them appropriately.
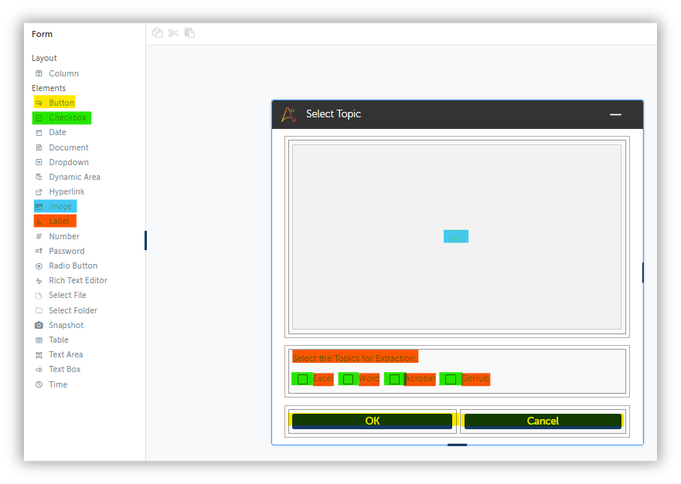
Lets Design Some Forms!
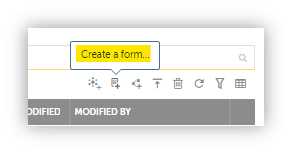
To create a form, head over to your Automations Tab and click on the page icon present on the top right corner on the toolbar as shown below:
Once that’s done, you will be redirected to the Form editor page where you can start designing your very own templates.
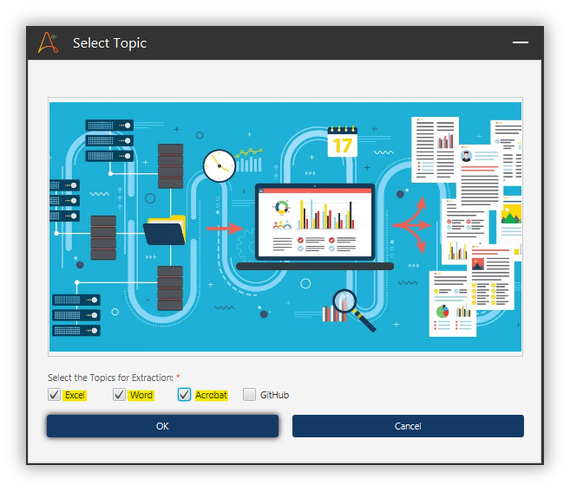
This is the design I came up with for my data scraper.
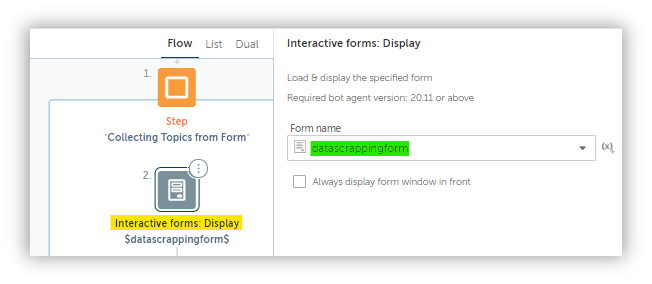
Once you design the form and are satisfied with the output, you may head back over to the bot which will trigger it.
Trigger It?
Yes, Trigger it.
Our form isn’t smart enough to know when he ought to show up.
He will remain in the basement, playing video games until we call him upstairs.
But he can be really stubborn sometimes, so we have to keep pestering him to get him up and running.
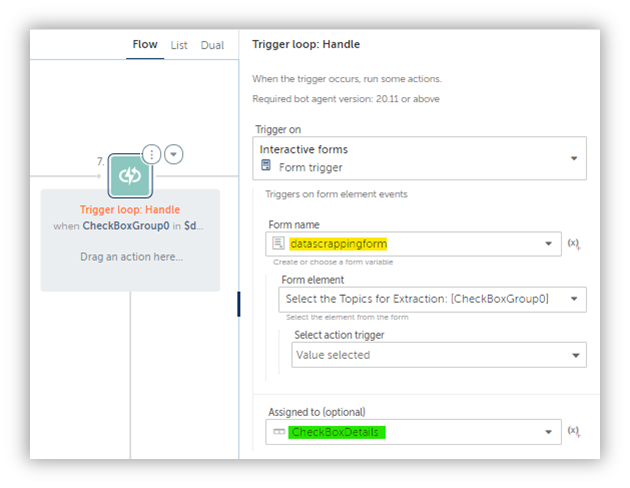
That is accomplished by pulling him into a Trigger Loop.
And once he is triggered, he will handle the rest.
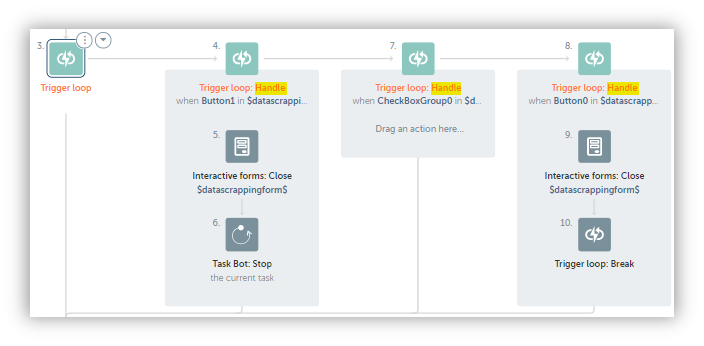
Each item in our Trigger Loop is “Handled”.
If your form consists of two buttons – one responsible for closing the form, other responsible for sending data back to the bot for further processing, and you DON’T include handles to interact with them, then your actions will remain unhandled.
And nobody wants an unhandled trigger.
Our form will remain triggered, and won’t close until we stop the process.
So ensure that you handle each item on your form like I have.
Data Is Retrieved…But In What Form?
This is where it gets tricky.
Well, not exactly, but kind of.
Let me show you what I meant by that.
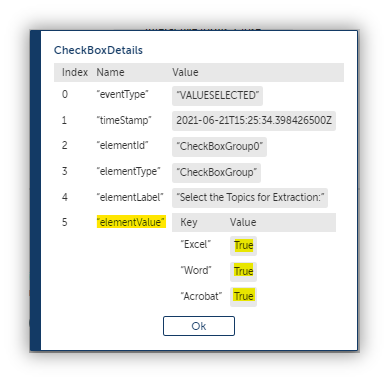
It’s a record, with one of them being a Dictionary.
That dictionary will contain values of our checkboxes in Boolean values, as show below.
Items like checkboxes record values in terms of ones and zeros or truth and false, which is also called Boolean.
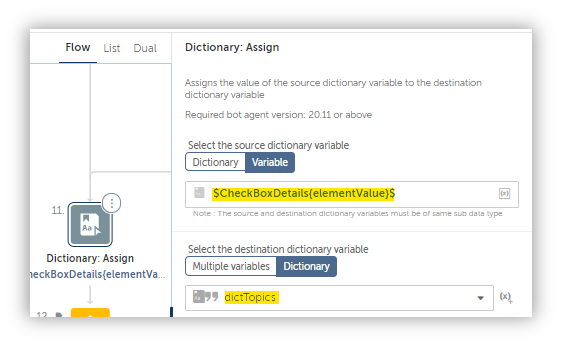
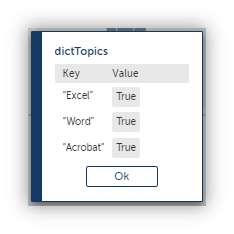
We only wish to retrieve that, which is why I have stored it into a dictionary which will come in handy while creating our Excel File and populating it with data.
What, you thought I was going to pool all my data into a single sheet?
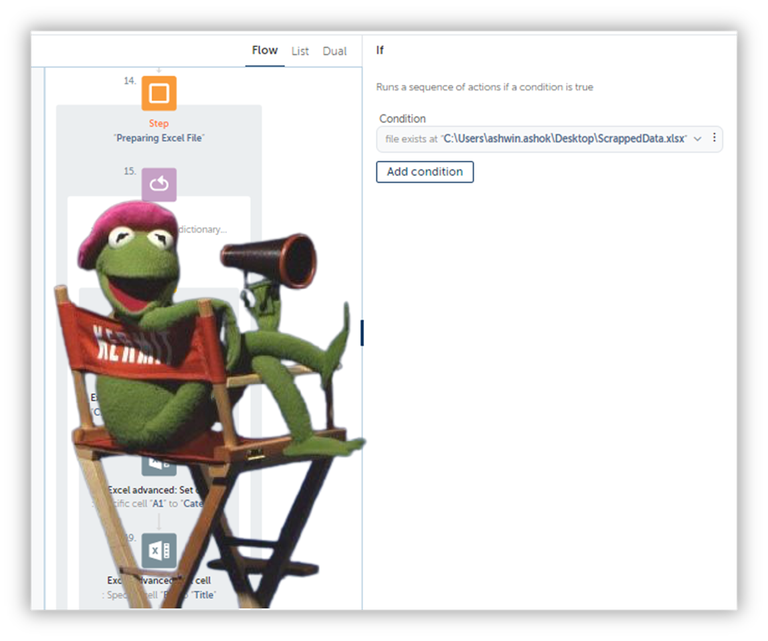
Once we have prepared our excel file, we can move into the data scraping.
We have explored that in earlier installations of this series.
I know I haven’t explained as much I should have, and it’s done on purpose.
You won’t learn a damn thing if I sat here and spoon fed you everything.
Developing this process was no easy task, and I don’t expect it to be easy for you either.
Learning happens when you invest time and effort.
Now start practicing!